Stitching a design
Where to start and how to finish
Here's seven steps to get you on your way.
Preparation
We recommend using a tapestry frame or embroidery hoop to hold the fabric taut.
- Select your needle. Choose a tapestry needle which is suitable for the fabric count you are using; for 14 count Aida use a size 24 tapestry needle.
Stitching the design
- Find the centre. It’s usually easiest to start stitching on or near the centre of the design, working the larger areas of colour first. Fold the fabric in half both lengthwise and width wise, pressing lightly on the crease and then unfolding to see the centre. The centre of the design can be found on the chart using the two filled triangles - one at the top centre and one on the left hand side centre. Simply follow them down and across to where they 'meet'.
- Choose the thread for your first stitches as indicated by the chart.
- Separate your floss so that you have the number of strands as indicated in the design and cut your floss to a length that you feel comfortable with. If you have one of our kits then the thread will be precut to around 60cm. Since the design will generally indicate using two strands of thread shown as [2] next to the thread number) then you can either use two strands of 60cm length or a single strand folded in half to give a loop of 30cm. Use whatever option that you feel comfortable with.
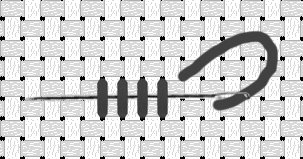
- Thread your needle and start by bringing it up through the fabric. Leave a short end at the back to secure the thread and start and finish each coloured area by passing the needle on the underside of a few of the existing stitches as shown below.

- REMEMBER THAT ALL STITCHES SHOULD GO IN THE SAME DIRECTION.
- Work all of the cross stitches first and then complete any outlines using a backstitch but only if the design requires it.
Finishing
When all of the stitches have been completed, examine the fabric and clip away any loose threads. Iron the piece under a clean tea towel.
Finally stretch, frame and display your finished art work!